For full functionality of this site it is necessary to enable JavaScript.
EMIN.ASIA
0

Summary of the four basic measurements using a caliper

04/08/2026 13:51:07

A caliper is a tool that almost every mechanic needs to have in their bag for measuring small parts or workpieces. Electronic, dial, or mechanical calipers can all accurately measure four types of measurements: external, internal, depth, and step

Outside the measuring line

The first measurement method we want to introduce, and this is the most commonly used, is to determine the surface dimensions of a workpiece.

Procedure: Open the lower jaw, place the object to be measured in the center, and close the jaw until it touches the surface. The data will appear immediately on the LCD or be read from the main scale markings.

Note: The ruler must be held perpendicular to the object. Even a small amount of dust or placing the ruler at an angle will result in an inaccurate reading of several millimeters.
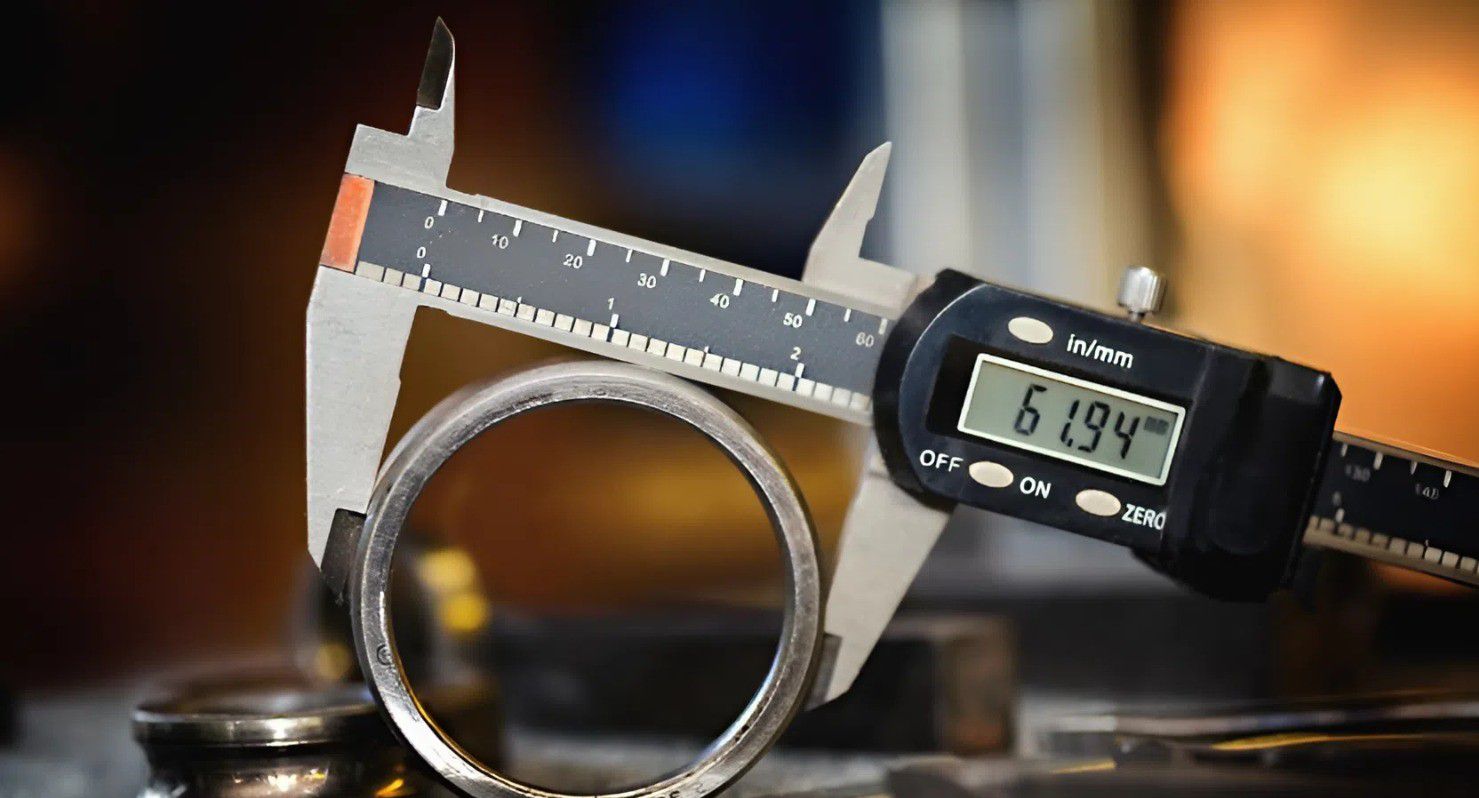
How to measure the inner diameter

When measuring the inner diameter of a tube or hollow space, the upper jaw (small jaw) will come in handy.

Procedure: Close the upper jaw and insert it into the hole. Slowly open the jaw until the two edges of the jaw are pressed against the inner wall of the workpiece. Tighten the locking screw to secure it before reading the measurement.

Note: It is recommended to use a caliper with jaws that match the width of the hole. If you frequently measure various sizes of workpieces, consider the difference between 150mm and 200mm calipers. See also: Comparison of 150mm and 200mm calipers: Which is the best-selling one you shouldn't miss? This will help you determine which caliper has a wider jaw range for your daily work.

How to use a depth gauge

Both mechanical and digital calipers have a thin bar at the end of the caliper body to measure the depth of holes or grooves.

Operating: Use your thumb screw to push the long depth bar out, place the end of the caliper perpendicular to the opening of the hole, and push the bar down until it reaches the bottom.

Note: Keep the caliper body parallel to the hole being measured. If the caliper is tilted, the measuring bar will be crooked, resulting in a longer reading than the actual length.

Methods for measuring length and degree

Calipers are also excellent for measuring the length of parts or the distance between uneven planes (step measurement).

Operation: Place the fixed jaw at the starting point, and slide the jaw to the end point of the section to be measured. For step measurement, use the end of the caliper to press against the edge of the workpiece and pull the jaw to determine the distance between two parallel planes.

Digital calipers are truly versatile if you know how to utilize all the parts of the caliper body. Popular models like the Insize 1108-200 or the waterproof models from Mitutoyo are designed to meet these measurement needs well. Hopefully, the above information will help you work more accurately and quickly when handling workpieces in the workshop.

Related News

6 Essential Measuring Instruments in a Solar Technician’s Tool Bag
09/16/2026 14:19:49

A measurement toolkit for solar PV installers does not necessarily need to contain a large number of instruments or excessive functions. What matters is having the right tool for each task on the roof: measuring DC voltage, checking string current, verifying polarity, testing insulation, checking grounding, or commissioning the entire system.

5 Steps to Check Grounding for Rooftop Solar PV Systems During the Stormy Season
09/16/2026 11:51:17

Rooftop solar PV arrays are installed at elevated locations and contain numerous metal frames, aluminum rails, and long cable runs across the roof. As the stormy season approaches, the grounding and lightning protection systems should be inspected to ensure that fault current and lightning current can follow the intended paths.

Why Does a Soldering Iron Heat Up Quickly but Still Solder Slowly ?
09/16/2026 11:04:47

Before contacting the material, a handheld soldering iron mainly heats the soldering tip. Once soldering begins, heat is continuously transferred from the tip to the material. If the heat supply is not sufficient to compensate for heat loss, the temperature at the contact area drops and the processing time increases

Decoding the Challenges of Semiconductor Chip Testing
09/15/2026 13:57:41

In the semiconductor testing and measurement sector—where every nanosecond and microvolt can determine the success or failure of a chip design—choosing the right test equipment has never been simply a matter of comparing specifications on paper.

Causes of nylon fabric yellowing
09/15/2026 10:05:40

Nylon fabric yellowing is a surface color change in which white or light-colored material turns yellow when exposed to light, heat, or chemicals. Therefore, a fabric color fastness tester is an essential part of the quality control process, helping manufacturers evaluate color stability before discoloration occurs in finished products.

Stay Updated with Offers

Get exclusive volume discounts, bulk pricing updates, and new product alerts delivered directly to your inbox.

By subscribing, you agree to our Terms of Service and Privacy Policy.

Quick Support

Direct access to our certified experts