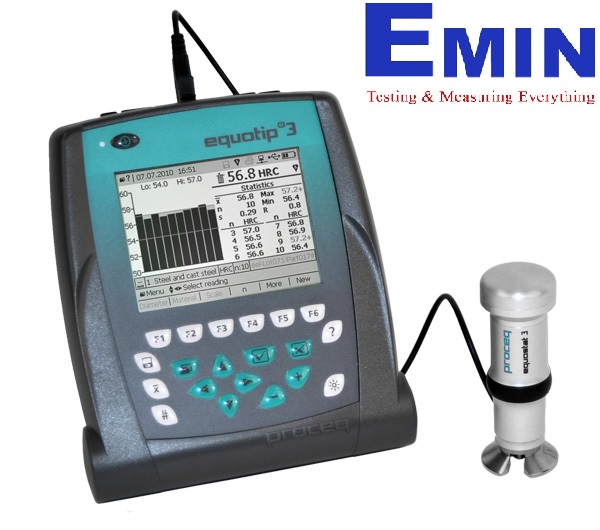
PROCEQ Equostat 3 便携式硬度计
制造商: PROCEQ Model: Equostat 3 - 联系
Call for the best price
Hanoi city: (024) 35.381.269
Danang city: (023) 63.747.711
Bac Ninh city: (0222)730.39.68
HCM city: (028) 38.119.636
- Maker: Proceq
- Model: Equostat 3
The Equostat 3 was developed for accurate, rapid and reproducible metal hardness testing. It features excellent sensitivity through small penetration of a few µm and is therefore particularly suited for testingmetal hardness of surface layers on scratch-sensitive and polished parts or on thin parts, profiles and pipes with a wall thickness that is below 2 mm (0.08”).
The Equostat 3 works well in outdoor, factory and lab environments. It has only very few requirements on test piece geometries. The Equostat 3 probe can be connected directly to a laptop or a PC. Alternatively, the probe plugs into the Equotip 3 indicating device to combine the Rockwell principle of Equostat with the Leeb rebound principle of Equotip 3 to become the most versatile hardness tester. Live user guidance dialogs enable the user to obtain very accurate and highly reproducible measurements
- Precise metal hardness testing of very soft materials through to very hard materials
- Thin parts, profiles and pipes of a wall thickness ≤ 2 mm, sheets, coiled metal, as well as parts as thin as 0.2 mm (0.008”), depending on the hardness level
- Testing on scratch-sensitive or polished surfaces
- Metal hardness testing of heat-affected zones near welding seams
Proceq offers accessories such as a measuring clamp or several support feet adapt to freehand hardness measurements on various test piece geometries
- Accurate, rapid and reproducible metal hardness readings
- Measurements are independent of the material and sample dimensions
Testing range from very soft (aluminum) up to very hard materials (case-hardened steel) - Measurement in HRC, integrated conversions to HV, HB, HRA, HRB, HR15N, Rm possible
- Transfer of up to ~100000 stored readings from the Equotip 3 indicating device to a PC using Equolink 3
- Small test load yields small penetrations of only a few μm
- The Equostat 3 probe can be used in either a clamp or freehand
- In addition to the Equostat 3 probe, all the impact devices of the Equotip metal hardness tester can be used to also conduct rebound hardness testing with the same indicating device
- DIN 50157 (2007)
- ISO 18265 (2003)
- ASTM B724
- ASTM E140 (2007)
- DGZfP Guideline MC 1 (2008)
- VDI / VDE Guideline 2616 Paper 1 (2010)
|
Equostat 3 Probe |
|
| Measuring range (DIN) | 0-100 µm; 19-70 HRC; 19-70 HMMRC; 67-638 HB; 35-950 HV; 60-86 HRA; 29-107 HRB; 225-2250 MPa (N/mm2); 69-94 HR15N; 88-96 HR15T |
| Resolution | 0.1 µm; 0.1 HRA; 0.1 HRB; 0.1 HRC; 0.1 HRE; 0.1 HRH; 0.1 HR15N; 0.1 HR15T; 1 HB; 1 HV; 0.1 HS; 1 MPa (N/mm2) |
| Measuring accuracy | ± 0.8 µm (~ ± 1.0 HRC) over entire range |
| Maximum test hardness | 70 HRC |
| Test direction | any direction (no correction required) |
| Test loads |
preload 10 N / total load 50 N |
| Diamond indenter | angle (100.0±0.5)°, diameter of flat area of (60±0.5)µm |
| Metal hardness tester Equotip 3 indicating device: | |
| Dimensions | 170 x 200 x 45 mm (6.7 x 7.9 x 1.8 inches) |
| Weight | 780 g (27.5 ounces) plus battery pack 120 g (4.2 ounces) |
| Display | large QVGA LCD with adjustable contrast and backlight |
| Internal data storage | 100000 - 1000000 values (depending on data type) |
| Interface | Ethernet, USB 1.1, RS 232 |
| Battery type | rechargeable Li ion or 3 standard size “C” cells |
| Battery max. charge voltage | 4.2 V |
| Battery operation period | typically 10 hours |
| Operating temperature | 0 to + 50 °C (32 to 122 °F) |
| Humidity | non-condensing, 90% max |
- 质量承诺
- 正品保修
- 送货到家
- 交易简单化